Monday, August 31, 2009

What's in a name?..... frame.......

This Wednesday is my first open house since last spring. Around here people are so busy during the summer with vacations and having people come to visit them that it's hard to get people together to stamp, let alone have a workshop or stamp camp. I'm pretty excited and am hoping that I get a decent turn out!

One of my friends had her first baby this summer. She was decorating the nursery in pink ladybugs. I had already gotten her a gift for her shower but thought I would make a little something for her actual birth. The first is a name frame that Angela could hang in Katie's room. I used my Cricut to cut out the letters with the Plantin Schoolbook Cartridge in Regal Rose. I then layered the letters on whisper white that I had stamped from the ladybug image from Darling Dots Stamp Set in Rose red and Regal Rose. I then mounted that on some more Regal Rose and then finally on some Rose Red. I had the frame from a previous name frame class that I had a while back.

I also made a family name frame for Angela and Kevin to hang in their house. I used the Well Worn alphabet and also the All in the Family and Family Accessories stamp sets. I used Stampin' Up! inks and markers for the coloring.

Finally the card that I made to go with it all I got off of Dawn's Blog here. She has a great video tutorial on how to make this card. I cased the one she made but just changed up the colors.

Monday, August 24, 2009

The first day of school...

Well today is the First day of the school year. In my class this year - as of the roster I received on Friday - I have 18 students. Every year, even though I am an adult, I still get the first day of school jitters. I know deep down that once everyone is in the room and I get started teaching that I will be fine, but still there is that little bit down deep that makes me nervous. This year I created some back to school gifts for my grade level PLC team. This card was made using a variety of things. I used my Cricut to create the letters here (I don't remember what cartridge I used at the moment.) All the other products on this card are from Stampin' Up! I used the rounded tab punch and the three flower punch to create the apple. I free handed the leafe and the stem. I used the primary lines wheel (retired). As far as paper I used Soft Suede, Garden Green, Real Red, Whisper White, and Basic Black.


This year I created some back to school gifts for my grade level PLC team. I got the idea for this bag from a local news show called Studio 5. This bag was made using refrigerator tubing for the handle with ribbon run through it, vinyl table cloth that you can pick up at Wal-Mart, some boondoggle cording, a Bind-It-All and some patterned cardstock. I used some Old Olive ribbon from Stampin' Up! and some patterned paper from DCWV. I made 5 of these bags - one for each member of my team and one for myself. Each bag was different. I put some really cute items inside each bag too.


Here is a pencil holder made out of more DCWV cardstock. I also used some Stampin' Up! Ballet Blue cardstock for this as well. In the bottom right corner you can see that I have used the Matchbox Messages stamp set from SU and also the circle, scallop circle punch, Old Olive ribbon and Top Note Die are from SU. I found the tutorial for this pencil holder here at the Kreative Jewels blog.


Here is the inside and outside of a little notepad that I made to put inside the vinyl bag. I got the notepads cut in half (they are the 5x8 size to start with) for a minimal fee at an office supply store. I used more of the same paper and ribbon to alter them.


I used the SU Matchbox Die to create this cute little Hershey's Nugget Holder. I am also going to use the same die and process to make about 50 more for a friend's bridal shower in the middle of September. That, I believe will be the next project.


Every time that I go to Target I check out the Dollar Spot. Sometimes you can find cute things to alter. I found some of these jumbo clothes pins there over the summer and thought they would be perfect on a desk to hold important notes and such. Here is the one that I altered to go with this bag. I used my adhesive to put the decor paper on both sides, tide some ribbon around it and viola!

I hope you have enjoyed my projects today. Leave a comment or two :)
Thanks for stopping by!

Thursday, August 20, 2009

They say it's your birthday....


And well yes, today is my birthday! :) Here is a card I made for my mom a few weeks ago for her birthday.
It uses the Crazy for Cupcakes Stamp Set as well as the Party Animal Stamp Set and a cupcake wheel that I can't remember the exact name of right now. It uses some of the awesome new In Colors - Bermuda Bay, Soft Suede, Melon Mambo and Whisper White - for the card stock and markers. It also has some Crushed Curry polkadotted ribbon. Cute huh? :)

Tuesday, August 18, 2009

Twas the night...


Before I return to work for the school year. I can't believe that my summer is about over. It has gone by so fast! One of the things I am going to miss is being able to craft all day every day. I am, however, hoping to find some time during the week to be crafty.

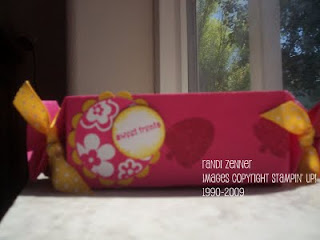
Here is a cute little treat box I made for a challenge at splitcoast. I used the new Circle Circus stamp set, and the new Teeny Tiny Wishes stamp set. I also used the Tart and Tangy stamp set with the scratch and sniff technique on the box itself. I used Melon Mambo and Crushed curry card stock, ink, and ribbon. This size box would fit a fun size candy bar or maybe a sucker in it. You could also fit a Stampin' Spot and an incentive stamp in there.

Monday, August 17, 2009

Did ya miss me?


Phew! Sorry for the lack of posting the past few weeks. It's that time of year again where I'm starting to split my time between home and school. I can't believe that I have to return back to work on Wednesday and be prepared for the students to start back again by next Monday. Despite the split in my attention I have gotten a lot of crafting done. I finished the big 5 oh card project for my mom just in time for her birthday. I haven't uploaded those pictures yet, but will do so soon so be on the look out for that! I also have been busy making some cute back to school gifts for my grade level co-workers which I will be showing next week some time. Here are a few projects that I can show you though....

This card was made using no stamps at all. I used punches and my Big Shot for everything on this card. It uses the large dots texturez plates, the sweetest stems sizzlets die, the scallop circle punch the 3/4" circle punch and the go go boots alphabet. The card stock is whisper white, melon mambo, soft suede, crushed curry, and old olive. I used a small white grommet and some melon mambo polkadotted ribbon. Hope you like it!

Monday, August 3, 2009

August Stampin' Up! Promotions


With a new month come new promotions. The Just for kids Campaign runs from August 1- Sept 31st. One of the promotions going on is the Decore Elements Growth Chart Special. If you purchase this adorable growth chart for $24.95 (regularly $27.72) you will receive a free applicator tool. Another special that we have going on right now is the Growing up Promotion. This promotion only runs Aug. 1-31st. If you spend $35 on stamps from the Growing Up section of the current Stampin' Up! Idea Book and Catalog you will be able to choose a FREE package of our Deigner Series Buttons (a $7.95 value.) Hop on over to my Stampin' Up! Website to take advantage of these great deals! Remember they are a limited time offer!

Sunday, August 2, 2009

Altered Tins

After having the recipe tin class I still had some tins left over. My friend Jen asked me if I would make a recipe tin for her sister who has a birthday coming up in a few days. I used some old SU designer series paper (Bali Breeze) and then did some paper cuts with some flowers from the Pink Flamingo DSP. I used the retired Taste of Textiles Specialty Paper (black) to cover the bottom of the tin. Used some hodgepodge hardware to make a name plate. I cut the letters out with my Cricut using the Simply Sweet Cartridge. Inside this tin are custom made recipe cards and dividers to match the outside. :)


I also made this really cute tin for my friend Cheryl who had a birthday this past week. I filled it with pleanty of home made cards. She is great about writing little notes or thank you cards for all and every occasion. I used the Pink Flamingo Designer Series Paper for this tin. I also used Real Red and Rose Red to cut out the letters with my Cricut Simply Sweet Cartridge.

These tins are super quick to make and make a wonderful gift. I hope Cheryl and Krissy (Jen's sister) enjoy their gifts!